Tuesday, December 20, 2011

Art Journal, Helmar & Faber-Castell

Greetings!!! Is everyone surviving the holiday rush?
I just finished taking 30 Days in Your Journal with Julie Fei-Fan Balzer...it finished up Nov. 30th and I was so sad. I really did journal every day and posted it on Flickr. What was I going to do? I was on a roll ...but Julie came to the rescue with an idea of 25 Days Until Christmas journaling prompts.

So with my trusty HELMAR Adhesives and the awesome Faber Castell products I set to work. I'm pleased to share with you what I've created up to today...the 18th of Dec. 

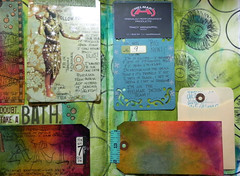
Cover Page: What is interesting about this page was I used a catalog cover but I did not use a Helmar adhesive to adhere it to my page...I know as I hang my head in shame. You can see that the cover did not adhere flat, it wrinkled here and there...lesson learn...ONLY USE HELMAR!
Cover

Days 1-5: I found these great cookie pictures in the Dec. 2011 edition of Food Network Magazine and just knew I had to use them...this time I adhered these pictures with HELMAR Decoupage and Craft Paste. The difference...no buckling! The journaling was completed with my trusty Faber-Castell PITT Artist Pen.
Days 1-5
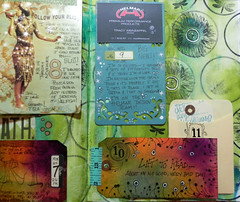
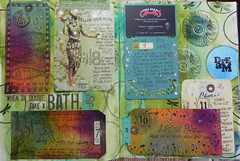
Days 6-10: More catalog pictures adhered the correct waay with Helmar Decoupage and Craft Paste and journaling done with Faber-Castell PITT Artist Pen.
Days 6-10
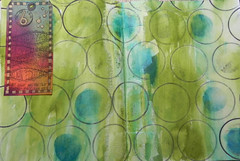
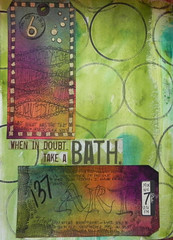
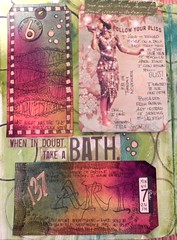
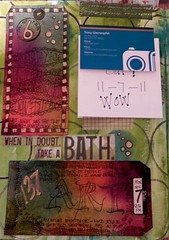
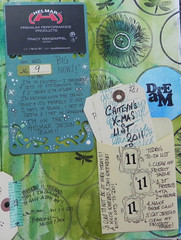
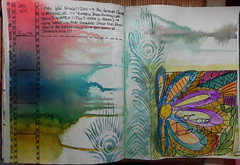
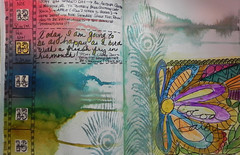
Days 11-18: On this page I knew I was running out of time and energy but I didn't want to give up. I searched through my stash and found these great journaling circles...I've had them for awhile and I can't tell you who made them. This time I pulled out the Faber-Castell PITT Artist Pens in great colors to complete the journalling. 
Days 11-18

Days 11-18 b

Decoupage

I hope you enjoyed my journal pages. By using the best products from HELMAR and Faber-Castell it makes the ability to create so easy.

Monday, December 19, 2011

Studio Organization ~ From Chaos to Calm!

I know that the holidays are not over yet but I am thinking forward to 2012. It is all the fault of Tracy Weinzapfel  and her blog post about reclaiming her studio! Right now my studio is in utter chaos and each passing day it gets worse. It's making me CRAZY...today I think I've stumbled upon the answer...

Balzer Designs

Oh yeah...I'll be there because I need all the help I can get and if you know Julie, well I have the feeling she will help whip me & my studio into tip-top-shape!!!

Friday, December 16, 2011

7 Dots Studio paper collections have arrived...YIPEE!!!


Very excited to announce that I am carrying both paper collections from 7 Dots Studio...DREAMER & ELISE REBEL at Besottment Unlimited. These absolutely gorgeous papers are imported from Poland. Designed by two incredible artists...Anna Dąbrowska – Pękocka, also known as Finnabair and Anna Iwanowska-Pietkiewicz, known rather as Anai.
                       

                      DREAMER


Thursday, December 15, 2011

Tattered Angels Warehouse Sale has been extended!!!


Tattered Angels Warehouse Sale has been extended!!!

The Warehouse sale was such a HUGE hit, Wendy decided to extend it for a few more days!!
Dec 20th is just around the corner...better hurry and get your kit now! It would make a great holiday gift for yourself or even for a friend.


Don't miss out on these over stuffed boxes being offered ...

Go to our website www.mytatteredangels.com for more details ...

Use code VWS1111 for free domestic shipping
or use code VWS1111int for a discount on International shipping

I just wanted to take a moment and address some of the comments we've received in regard to the boxes. The description of the sale, is literal.... "Wendy is cleaning house". This was truly a Warehouse/Garage Sale just as it is described. I want valued customers like yourself to be happy with the volume of product you receive in the box. The box contains lots of Vintage Tattered Angel Products, along with other manufacturers products collected from years gone by that we still felt had value to a consumer.

There is an image on our web site to show you an idea of what you would receive and also give you a general feel for what is included in your kit. Some of the products are not "New" packaged product, nor are we saying that they are.

As shown in the image on our website and compared to what you actually receive, these boxes have a amazing value. We included extra products that were not even listed in kit details just because we wanted to give you more bang for your buck. For example two Glimmer Screens are shown in the picture and we send 15+ screens in the largest kit giving it an extra added value of $30.00.

I have addressed the quality of packaging with my staff and have resolved any concerns about future shipments with possible damage to contents. We will certainly replace any item that was damaged, please just submit an image of damaged item so we can view damage and identify the product. We will try to replace with the same item but if its not in stock we will substitute with a similar item.

As for the paper we shipped with the kits, we added these packs as an added value, Please remember this is a warehouse sale and we are a manufacturer and not a retail store, so we sell in bulk. We have an ABUNDANCE of paper in our warehouse that we felt still had a value to a consumer instead of recycling the paper we would just send them in the kits as "give a ways" . If we were going to include them as a selling factor for the kits we would have taken the time to sort 1 sheet per paper and we would have listed the paper as various styles.

Again please accept our apology and know this is our 1st sale and we are learning many things from having this sale.

The "Values" below are based on what the total retail price of the items would be if you had purchased it all separately.

Small Kit Original Retail "Value" $100... your "Garage Sale" price $25
Medium Kit Original Retail "Value" $170... your "Garage Sale" price $50
Large Kit Original Retail "Value" $230... your "Garage Sale" price $75

Thank you,

Saturday, December 3, 2011

HELMAR Holiday Hop


It’s that time of year where we all start thinking of the holidays so what better way to get your Holiday spirit than a great Helmar Holiday Hop? Filled with so much Holiday cheer and some amazing projects featuring all the different Helmar Adhesives.

Hello everyone and welcome to my stop on the Helmar Holiday Hop. If you have been following along, you should have hopped here from Natasha’s blog. If not, you just have to stop at the Helmar Blog and start from the beginning. There are goodies along the way and we don’t want you to miss a thing.

Often time around the holidays we run out steam, time and money. I love to have some small handmade items ready to go for that oh-oh moment. This year I found at Pottery Barn a pack of 51/2" x 7" heavy card stock printed with music...cheap! Grabbed a pack knowing that the would be perfect for something.  I created from this a small wall hanging using two of my favorite HELMAR adhesives...Helmar Liquid Scrap Dots and Helmar Premium Craft Glue.


Using a set of angels wings from Wendy Vecchi's Studio 490 Art Parts I gave them a good soaking with Tattered Angels Iridescent Gold Glimmer Mist and purposely separated into layers. After giving them several coats of Tattered Angels Jolly Old Elf Glimmer Glam and forming them as they dried I was able to create a dimensional angel wing. Using Helmar Liquid Scrap Dots I was able to get even more dimensions on the wings. Some Helmar Premium Craft Glue and I was ready to attached my wings to the completed background.


Here is the completed mini wall hanging and I just love the fact that out of all my treasure drawers, where I keep all my bits of this and that, I was able to create this festive project.


I couldn't stop with just one so I'm going to share a quick project for a fun little frame create from a margin bin wood frame and shapes from Michaels. These can be misted, stained, painted...however you choose to finish and all shapes attached with Helmar Premium Craft Glue, quick as that. I printed the insert from my computer or you could use a favorite card or quote, this could even be a great project for your kids to work on for teacher gifts.


Well I hope you enjoyed what I've created. You will be seeing many more projects like this all month on the Helmar Blog...make sure to check back often. Now make sure you leave a comment at every stop because the elves of Helmar will be giving away prizes to some lucky Helmar fans. Now hop on over to Erika’s blog to see another amazing Helmar Holiday project. The Holiday Hop will be open for comments until 11:59P.S.T December 4th , so take a look and enjoy a little holiday spirit from all of us on the Helmar Team. 


Thanks again for stopping by today and Happy Holidays.


Wednesday, November 30, 2011

Tattered Angels, FabScraps & HELMAR...oh my!

It's beginning to feel like the holidays will be here sooner than later...am I ready? NO!...but I will be with a little help from Tattered Angels &  HELMAR. This week the HELMAR Design Team is sharing projects that combine fabulous products and embellishments from FabScraps {if you haven't checked this company out you must to see all the products} and HELMAR adhesives. I created a LO because I thought it showcased the FabScraps products I received. I prefer a simple style with a few great embellishments, for this project it was a fantastic bare chipboard frame and metal embellishments. You can see below the progression of the FabScrap pieces from plain to glimmery, from single to layered. The FabScraps chipboard frame was first misted with Tattered Angels Mallard Glimmer Mist and then again to kick it up a notch with Ocean Spray Glimmer Glam.
LO-STEPS-webHere is the finished Lo and you will see how the fabulous FabScraps pieces have helped to complete the piece. If you look closely you will see the frame appears to float over the paper, the Helmar Liquid Scrap Dots has actually lifted the frame by 1/8". Once dried it is not going to collapse on the project...that is the amazing part of the Liquid Scrap Dots! Using papers from 7 Dots Studio and Basic Grey collections they have been misted, inked, stenciled, splattered, stapled, distressed and torn and then adhered together using the Quick-Fix Adhesive Runner. Remaining Prima felt pieces are tucked into corners and another FabScraps metal embellishment with a Sparkler from Webster's Pages was attached with Premium Craft Glue and Gemstone Glue.
LO-web
Because I didn't want to add journaling to the LO itself I created a simple hidden pocket on the back, applied with the Quick-Fix Adhesive Runner to secure my journaling spot.
JOURNAL POACKET web

JOURNALINGweb


Thanks for stopping by...it's always nice to have company ;) Until next time...
SIGNATURE-web

Wednesday, November 23, 2011

30 Days in Your Journal Day 6-14

Thought I would catch up showing my finished pages that I'm creating in Julie Fei-Fan Balzer's online workshop...it is the bomb class!! Please check this opportunity out...you will not be sorry...10 min. a day!

Days 6 - 14 {This is going to photo heavy...just warning you}


NOV. 6
30 Days in Your Journal

NOV. 7
30 Days in Your Journal

NOV. 8
30 Days in Your Journal Untitled

NOV. 9
30 Days in Your Journal

NOV. 10
30 Days in Your Journal

NOV. 11
30  Days in Your Journal

NOV. 6-11 COMPLETED PAGE
30 Days in Your Journal

NOV. 12
30 Days in Your Journal

NOV. 13
30 Days in Your Journal

NOV. 14
30 Days in Your Journal

HOPE YOU ENJOYED LOOKING!


Tuesday, November 22, 2011

Tattered Angels Love Stencils, Stamps & Masks

This month the Tattered Angels Design Team focused on how to use various stencils, screens & masks. I find that many of my projects start with this technique and I wanted to share what one looks like before I finish it. This is a great way to make your own resist paper. I started with a plain kraft brown cardstock and 3 different screens. The starburst and harlequin stencils are from The Crafters Workshop while the circles are from a piece of punchinella. I scrapped Claudine Hellmuth's Multi-Medium Matte over the stencils and allowed it to dry. I then Glimmer Misted and allowed the paint to drip randomly down my paper {I flipped the paper because I like the dips floating up. I really loved the effect of colors and the designs left where ever the Multi Medium resisted the mist. Cool, huh?
Here is the finished layout. I used Tattered Angels Glimmer Mist in Blackberry Cordial,Butternut SquashMallard and Snowy Pine to create the splashes of color. The mailing tag was what I moped the excess Glimmer Mist with, the chipboard from Out There Chippy received extra coats of the same Glimmer Mist used in the background and I applied the brass embellishments from Out There Trinkets with my ever faithful Helmar 450 Quick Dry Adhesive and Liquid Scrap Dots. This is a really simple technique...just think...you can make your own mistable resist paper.My second project this month was the Pink Paislee Shadowbox. If you've been following this blog you know that Tattered Angels paint products and wood are a match made in heaven. Here is the completed project...it is going to be a gift for Christmas so I did not embellish the inside, leaving that to the gift recipient.
I started this project by covering the frame with a coat of Tattered Angels Butternut Squash Glimmer Mist. A Tattered Angels flourish screen was then placed down and misted with Blackberry CordialPumpkin SpiceMallard & Timberline. To define the opening I stamped using Archival Jet Black ink to insure the next layers of color would not bleed through. The inside of the shadowbox was covered with random sheet music and pages from a book using Helmar Decoupage & Craft Paste. I used the Harlequin stencil from Crafters Workshop and gesso to lay down another layer for texture. When dry Tattered Angels Nougat Glimmer Mist was applied and allowed to drip giving it a look of being old. The wooden cut-out embellishments from Kaisercraft were misted with Tattered Angels Chalkboard Mist in Fairway & Fern. I attached the wood and brass embellishments with Helmar 450 Quick Dry Adhesive and then a final coat of the fabulous Twinkle Toes Glimmer Mist {oh my, if you haven't tried this yet then put it on your list}.
My last project was done on the reverse side of a Prima Mistable canvas sheet...I wanted to do a canvas but I didn't have one so I utilized this and applied it to a 12x12 canvas board with Helmar Premium Craft Glue...turned out to be a great solution and the Prima canvas is of such quality that I may have to by more just for that purpose!I used a Tattered Angels screen from the Bold Borders set and applied Rockin' on Sunshine Glimmer Glam over the screen and random swaths of it over the remaining canvas knowing it would resist further Glimmer Mists. I then use a Prima mask in the same area and lightly misted with Mallard Glimmer Mist. I stamped with the matching Tattered Angels Clear Stamp to finish. With random misting using Blackberry CordialPumpkin Spice &  Mallard Glimmer Mist I finished the background. I added a textured brick stamp to add texture and then I did a faux sewing technique to create the illusion of being sewn with black thread. To finish I used Prima Canvas letters sprayed with Butternut Squash and stenciled with Pumpkin Spice and Tim Holtz Grungeboard letters got a healthy coating of Mallard. The butterflies are cut out from Prima Mistable canvas misted and layered with the same colors as in the background and a coating ofTwinkle Toes Glimmer Glam applied. To complete the project a Prima Vine, May Arts Leaf Ribbon and the butterflies were attached with Helmar 450 Quick Dry Glue and Liquid Scrap Dots.
I'm thrilled with the way these 3 projects came out and I realized after the fact that the majority of Glimmer Mist & Chalkboard mists are from the Ltd. Ed. Fall 2011 Collection. Shows you the versatility of the colors and how different they look depending on how they are utilized.
Thanks for stopping by...hope you enjoyed  these projects !

Monday, November 21, 2011

Check out the new 2012 Tattered Angels Design Team...


To say I'm excited would be an understatement...
look who I will be designing with during 2012.


Tattered Angels Design Team 2012
Golden Ambassadors:
Nathalie Kalbach – Germany (Design Team Coordinator)
Designers:
Alissa Fast – USA
Anna Björklund – Sweden
Anna Dabrowska – Poland
Birgit Koopsen – The Netherlands
Evgenia Petzer – South Africa
Holly Simoni – USA
Jana Korečič – Slovenia
Kaori Fujimoto – Japan
Lene Neby - Norway
Louise Nelson – Australia
Martha Richardson – USA {that would be me}

Tuesday, November 8, 2011

HELMAR Design Team Announced...

I'm so excited to be able to announce that I have been chosen to be part of the new HELMAR DESIGN TEAM


Design_Team
Look who I will be creating with:
Tracy Weinzapfel (Design Team Coordinator)
Erika Taylor
Jessica Diedrich
Jen Erickson
L. Grace Lauer
Connie Mercer
Carisa Czlobicki
Angie Blom
Karen Taylor
Martha Richardson...that's me
Cheryl Boglioli
Trudy Sjolander
Jennifer Evans
Carolyn King
Natasha Naranjo Aguirre
Lydell Quin
Beck Beattie
Michelle Wallace
Renee Aslette
Rae Cooper
Linda Baldock

HELMAR products are my "go to glue" for all my projects, whether for my Tattered Angels Design Team projects or my personal projects. 
I love my HELMAR so much I even have my own personal 
"BIG MAC DADDY GLUE CADDY"

Thanks to HELMAR & Tracy for the opportunity and looking forward to sharing my projects with you over the next 6 months.

Come back & see me soon!!

Martha